There are many advantages to multitrack recording and as a result, it has become the standard for the modern recording studio.
Drums in particular are often recorded using multiple microphones with each part of the kit having it's own mic; sometimes a specific type of mic to help create a certain sound or resonance... for example small diaphragm condenser mics used as overheads, or a Sennheiser 421 on the snare or a Neumann U47 on the kick drum... all of these microphones and the associated microphone techniques, have been developed over the past 60+ years to create the best of possible recordings.
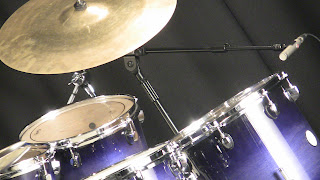
In our most recent recording session, we used a very simple 4 mic set up to record the drums. We used this minimal set up because we wanted to create as natural a sound as we could. This set up is based on the classic Glyn Johns / Led Zeppelin mic format: two Neumann KM184's (small diaphragm condensers) as overheads,
and a Sennheiser 901 in the kick drum
When it came to mixing the drums (combining the different tracks) a particular technique was used to give the drum sound more 'punch'. This technique is known as 'parallel compression'.
Compression.
The term compression refers to a production technique that is applied to audio in live performance or in post production. It is used to control the dynamic (the volume peaks) of for example singers who in a live or recording situation might go for a high note with a lot of power resulting in a sudden increase in volume, having a comressor in line will help to control that sudden surge of dynamic. In a post production sense, where the audio has already been recorded, the process can be used for creative effects, such as making a drum track (or any kind of instrument) sound more 'punchy'.
Why does is sound more punchy?
By reducing the dynamic range of a performance, the whole track can be made to sound more consistently loud.
Parallel Compression
This is a technique that is sometimes referred to as New York compression and it is useful because it does feature all of the benefits of compression techniques but without squashing the original dynamic, which is the inherent danger of using compression.
The idea is to maintain the natural dynamic of the original tracks but to mix in a heavily compressed submix of those tracks.
In the screenshot below, there are five tracks from a Pro Tools session.
Tracks 1 - 4 are the recorded drum tracks, kick, snare, overhead left and overhead right.
Below these 4 tracks is a stereo auxillary track labeled drums and it is on this last track that the compression takes place (the submix).
(Nb this technique will only work on a system which has ADC - automatic delay compensation).
You will see that there is no audio waveform present on the aux track. This is because the audio is coming from a send on each of the four tracks above.
A Waves API (emulation) was the plugin used for the compression. This plugin emulates a celebrated hardware compressor which is found in recording studios world wide.
There are many compressors available to choose from and generally each will impart a distinct sound to the production. On a limited budget it is important to choose a compressor that is applicable to a wide range of uses, which is why we went for the API (and a few choice others that I will talk about at some point in the future). You can buy them as part of the Waves 'Classic Compressors bundle.
The compressor settings are important: fast attack, fast release (although it is worth experimenting with this) and heavy compression 6:1 - 10:1. The idea is not to be gentle with the compression but to create a submix that is all about compression. Bear in mind this will be mixed into the original tracks not replacing them.
Finally I added some EQ, this time from the Waves emulation of another classic EQ... another API (!) the 550b.
Some Hi & Lo shelf EQ is all that is required.
Listen to the difference before and after the parallel compression is added at:


No comments:
Post a Comment